
Bulk contact sync to ConstantContact
This document outlines the steps required to perform a bulk sync of contacts to ConstantContact using the MPCRM platform. Following these instructions will ensure a smooth and efficient transfer of your contact data.
Steps for Bulk Sync
To initiate a bulk sync, follow the steps outlined below. The process is similar to that of a single sync.
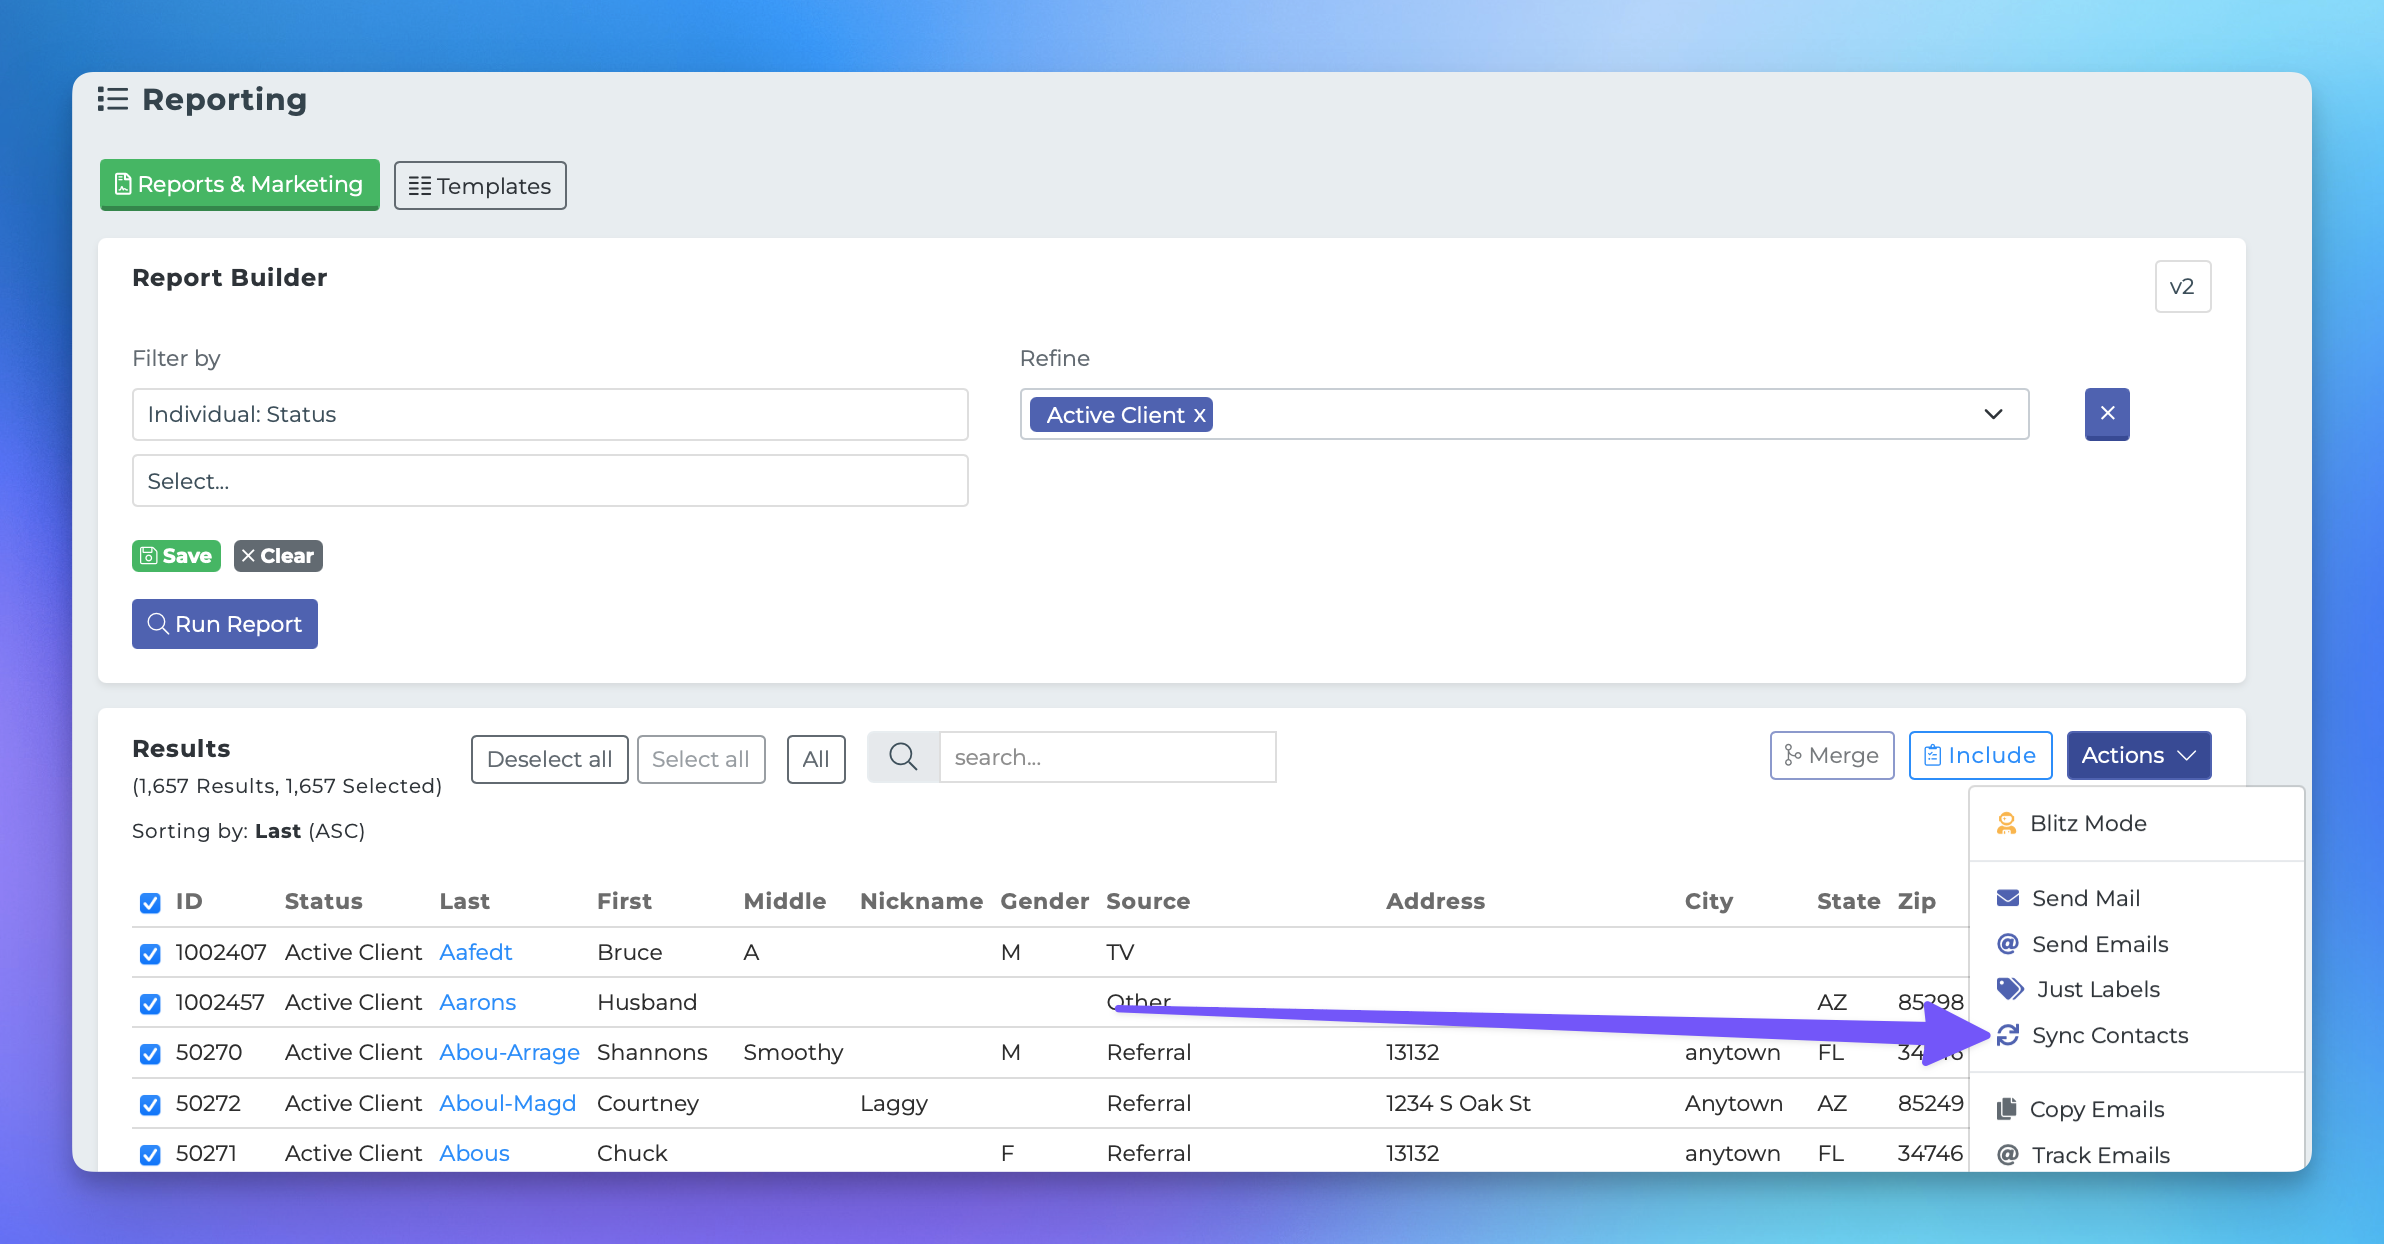
1. Navigate to the Reporting Page
Access your reporting page to begin the sync process.
2. Refine Your Contact List
Utilize the filter options available on the reporting page to refine the list of contacts you wish to send to ConstantContact.
3. Initiate the Sync Process
Click on the purple "Actions" button to reveal additional options.
4. Select Sync Contacts
From the dropdown menu, click on "Sync Contacts" to proceed with the synchronization.
5. Choose ConstantContact
Select ConstantContact from the list of available integrations.
6. Select Contact Lists
Determine which ConstantContact lists the selected contacts should be placed into.
7. Execute the Sync
Click the "Sync" button to initiate the transfer of contacts.
Processing and Status Updates
Once the sync is initiated, MPCRM will send the entire payload of contacts to ConstantContact. The contacts will be processed in batches. MPCRM checks the status of the batch import every 5 seconds and displays the results received from ConstantContact. Once the import is completed, you will see "Completed" as the status of the sync.