
Enabling Automations for Downlines
This document provides a step-by-step guide for agencies looking to enable the Automation add-on for their downline agents within the Agency Platform. Follow the instructions below to successfully activate this feature.
Steps to Enable the Automation Add-On
To enable the Automation add-on for a downline agent, please follow these steps:
Navigate to your Agency Platform: Access your Agency Platform by logging in with your credentials.
Access Your Profile: Click on your profile picture or initials located at the top right corner of the screen.
Open Agency Settings: From the dropdown menu, select "Agency Settings."
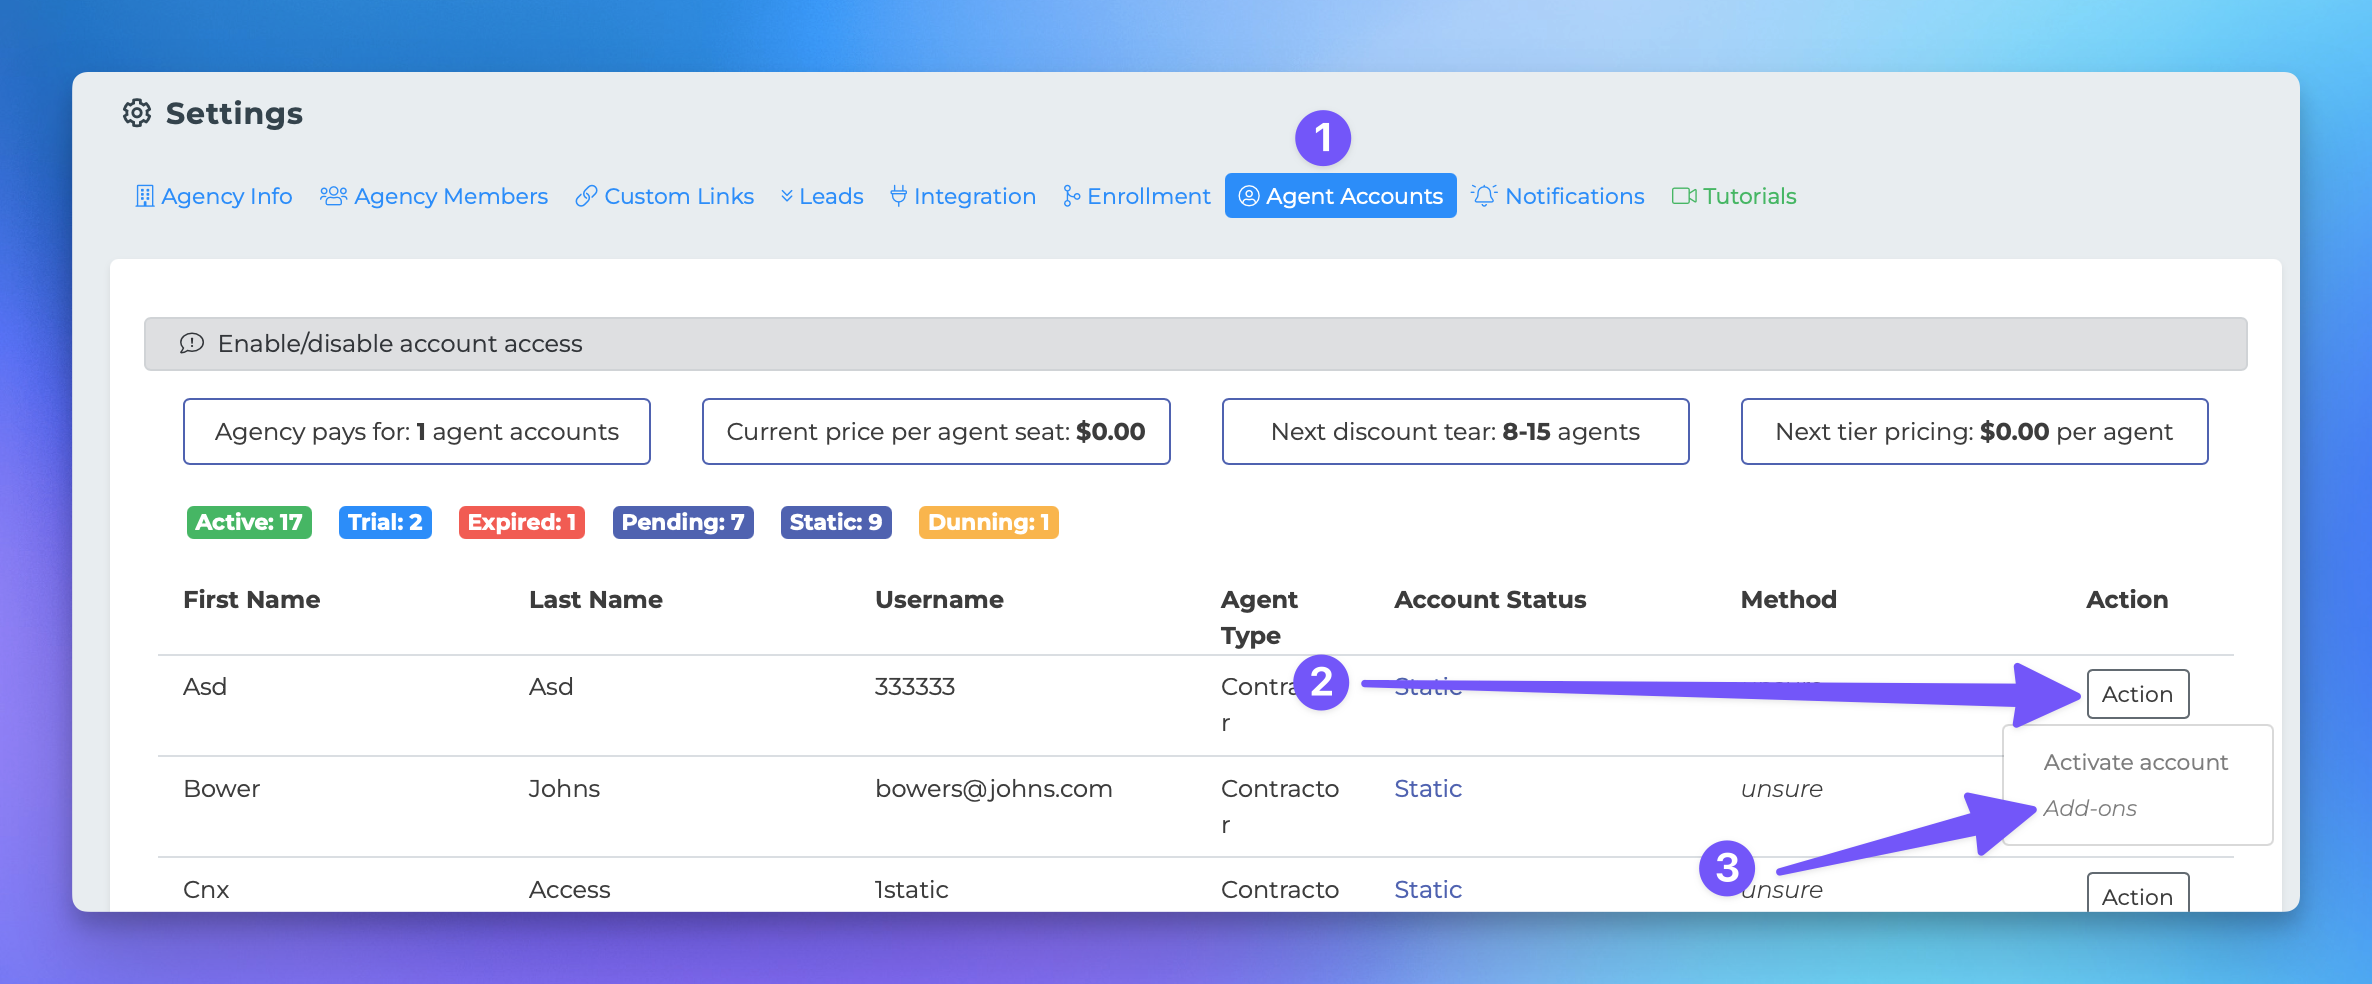
Select Agent Accounts: In the Agency Settings page, click on "Agent Accounts."
Choose the Agent: Locate the row corresponding to the agent for whom you wish to enable the add-on.
Access Add-Ons: Click on "Actions" in the agent's row, then select "Add-ons."
Select Automations: In the popup window, choose "Automations" to enable the add-on.
Once you have completed these steps, the Automation add-on will be automatically added to your billing account for that agent.
Removing the Automation Add-On
If you need to remove the Automation add-on, you can follow the same steps outlined above. Instead of selecting "Add-ons," you will click "Remove" in the final step.
For further assistance, please refer to our support documentation or contact our customer service team.