
Making a new Contact
This document provides a comprehensive guide on how to create a new profile within the MedicareProCRM system. By following the steps outlined below, users can efficiently add new clients or prospects to the database.
Steps to Create a New Profile
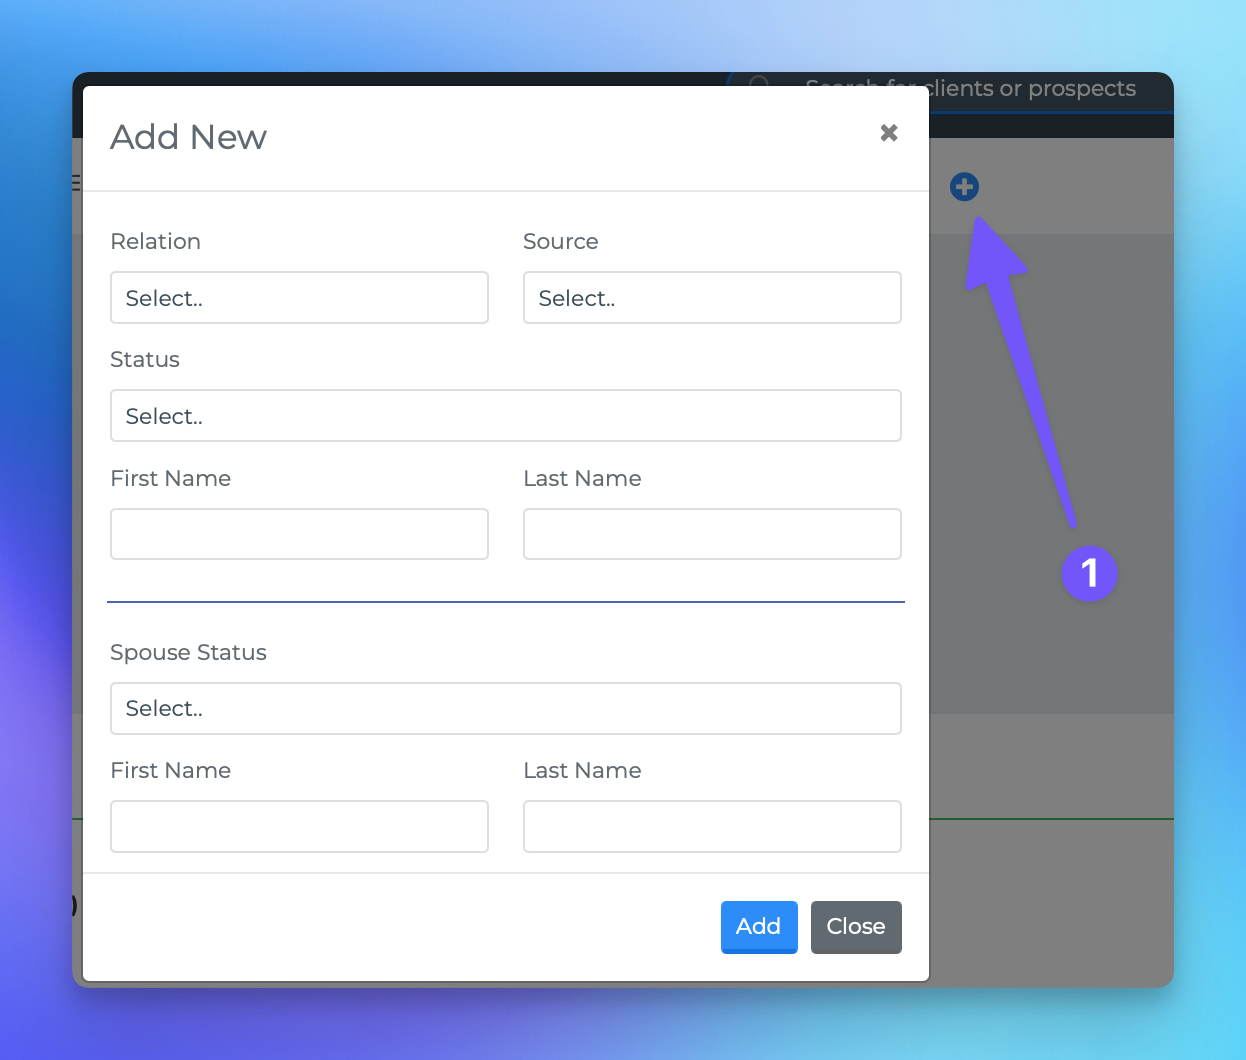
To initiate the process of creating a new profile, locate and click the blue + icon available throughout the system.
Fields to Populate
When creating a new profile, you will encounter several fields that can be filled out. Below are the key fields and their descriptions:
Relation: If you are adding a single individual, select "Single." If you wish to create profiles for two partners simultaneously, choose "Couple."
Source: This field indicates where the client or prospect originated. You can select from the predefined sources available in the CRM or opt for "ADD NEW SOURCE" to create a custom source. Any new source you create will be accessible in the dropdown menu for future use.
Status: You will need to specify whether the individual is a Client or a Prospect. If you select "Prospect," a checkbox labeled "Lead?" will appear. Checking this box will add the individual to your leads page. If left unchecked, the individual will remain in your database as a prospect.
First Name: Enter the first name of the individual.
Last Name: Enter the last name of the individual.
Zip Code (optional): You may enter the zip code of the individual, although this field is optional.
By accurately filling out these fields, you will ensure that the new profile is created effectively and is easily accessible within the MedicareProCRM system.