
Printing Mailing Labels
This document provides a step-by-step guide on how to create and print labels using the reporting feature in our system. Follow the instructions below to ensure a smooth process.
Steps to Create Labels

1. Navigate to the Reporting Page
Begin by accessing the Reporting page within the application. This is where you will initiate the process of generating your labels.
2. Run a Report
Once on the Reporting page, run a report to obtain the list of items for which you want to create labels. This will provide you with the necessary data to proceed.
3. Access the Actions Menu
On the right-hand side of the page, locate and click on the "Actions" button. This will reveal additional options for label creation.
4. Select "Just Labels"
From the Actions menu, click on the "Just Labels" option. This will open a label builder modal where you can customize your labels according to your preferences.
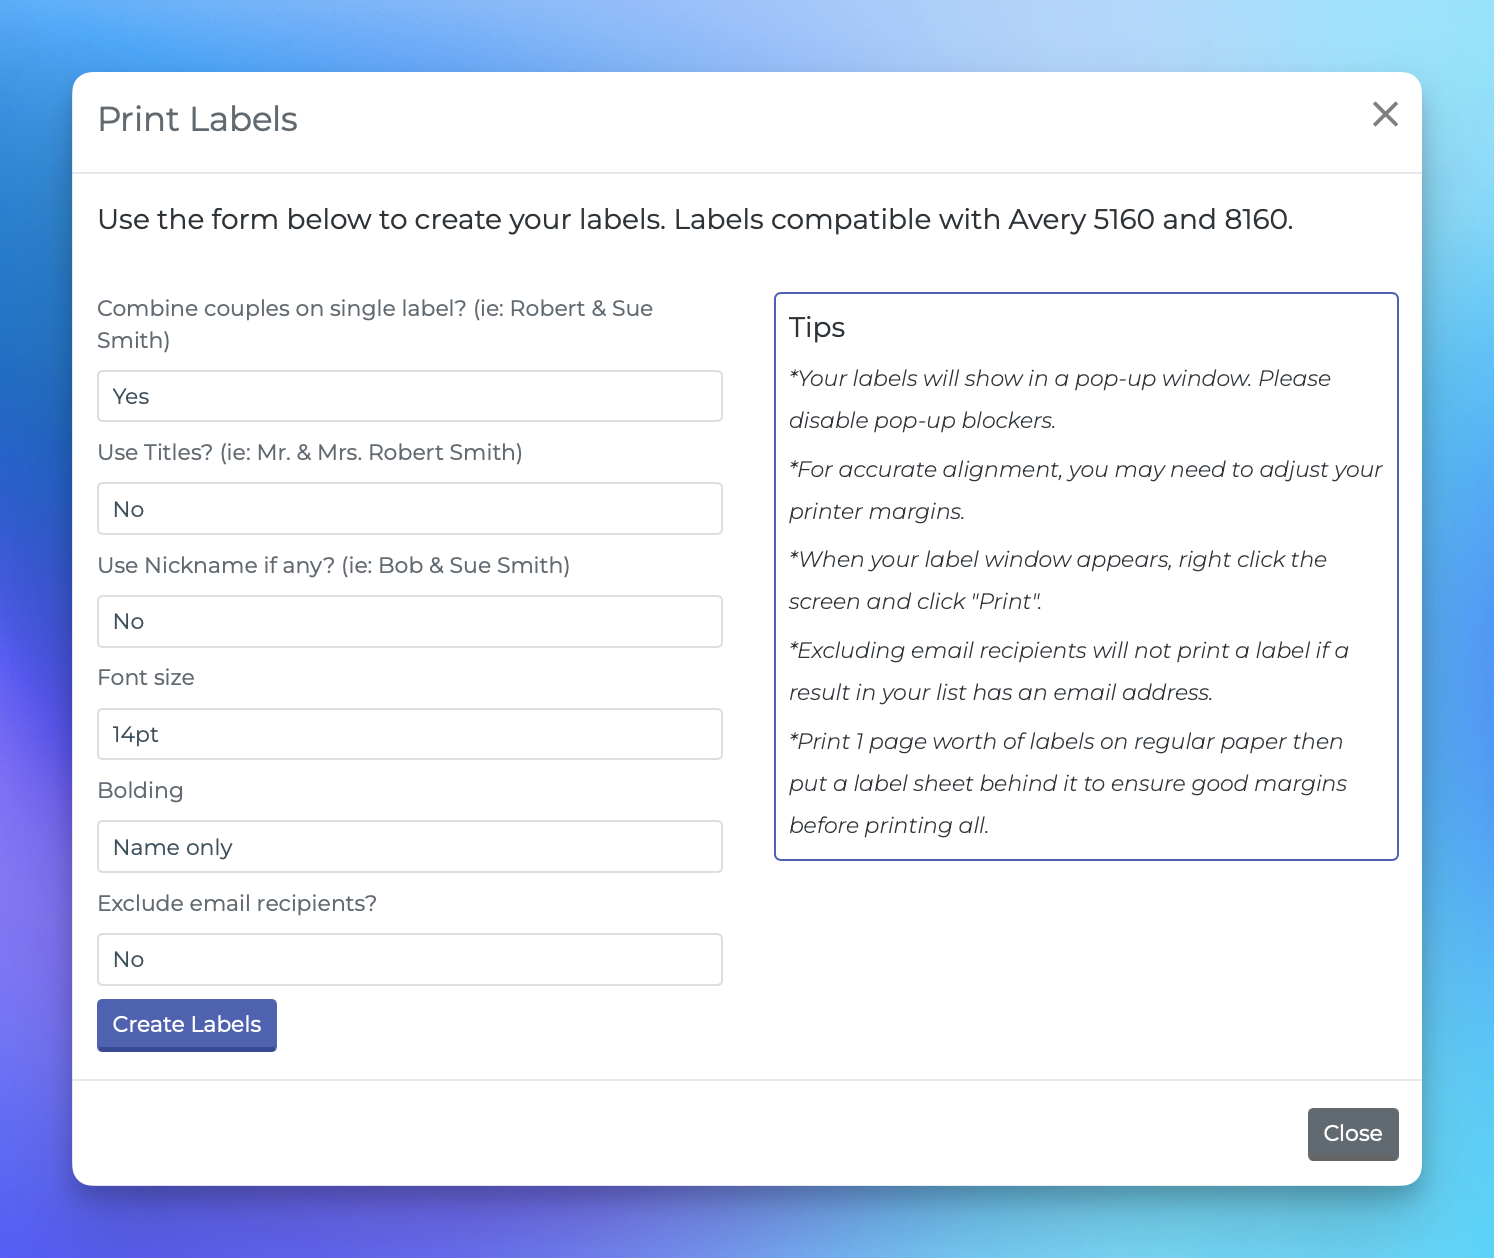
5. Customize Your Labels
In the label builder modal, select your desired preferences for the labels. Once you have made your selections, proceed to the next step.
6. Create Labels
When you are satisfied with your selections, click on the "Create Labels" button. Your labels will then open in a new window, ready for printing.
7. Printing Your Labels
Labels created using this process are compatible with Avery 5160 or 8160 label sheets.
It is advisable to first print the labels on a standard piece of paper. Hold a label sheet behind the printed page up against the light to ensure proper alignment. You may need to adjust the margins in the print dialogue of your browser to achieve the best results.Try setting the top and bottom at 0.5" and left and right at 0".
8. Disable Pop-Up Blockers
Before proceeding with the label creation, ensure that any pop-up blockers are disabled in your browser settings. This will allow the label builder modal to open without issues.
By following these steps, you will be able to successfully create and print labels for your needs. If you have any questions or require further assistance, please do not hesitate to reach out to our support team.