
Statement Upload and Column Mapping
Uploading a Statement
To upload a new commission statement:
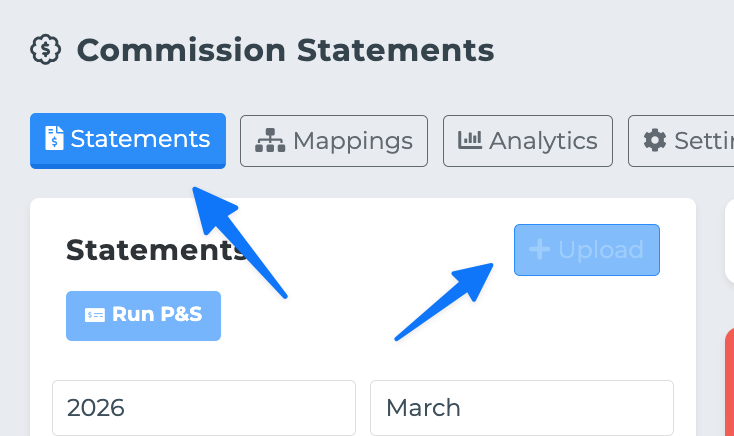
Navigate to the Statements tab and select the target year and month.
Click Upload Statement.
Choose an Excel (.xlsx, .xls) or CSV (.csv) file from your computer.
Enter a Statement Name — this is a label for your reference (e.g., "Aetna January 2025").
Select the Statement Date — the month and year the statement covers.
Click Upload.
After uploading, the statement appears in Draft status under its month group.
Column Mapping
Column mapping tells the system how to interpret the columns in your spreadsheet. Each carrier formats their statements differently, so you need to map each column to a recognized field.
Available Fields
The system supports a wide range of mappable fields, organized into categories:
Client Identification
First Name, Last Name, Full Name
Date of Birth
Phone, Email
Policy Information
Policy Number
Carrier / Carrier Name
Plan Name / Product
Effective Date
Status
Financial Data
Commission Amount
Premium Amount
Commission Rate
Agent Information
Writing Agent Name
Writing Agent ID / NPN
How to Map
Open a statement in Draft status.
The Mapping section shows each column from your spreadsheet on the left.
For each column, select the corresponding system field from the dropdown on the right.
Columns you do not need can be left unmapped — they will be ignored during processing.
AI Auto-Mapping
When you open the mapping interface, the system automatically suggests mappings based on your column headers. AI auto-mapping:
Analyzes column header names and matches them to known fields.
Pre-fills the mapping dropdowns with its best guesses.
Highlights low-confidence suggestions so you can review them.
You should always review AI suggestions before saving, especially for columns with ambiguous names.
Saving a Mapping as a Template
If you receive statements from the same carrier regularly, you can save your mapping as a reusable template:
After mapping all columns, click Save as Template.
Give the template a name (e.g., "Aetna Standard Format").
Future uploads from the same carrier can apply this template automatically, skipping the manual mapping step.
Templates are managed in the Mappings tab.
Mapping Status
After mapping, the statement moves from Draft to Mapped status. The Mapped status means:
Column assignments have been saved.
The system has parsed and validated the data.
Processing modules can now evaluate their readiness.
If you need to change mappings later, you can re-open the mapping interface and adjust.
Normalizations
Some carrier spreadsheets use non-standard values. The mapping system supports normalizations:
Status values — Carriers may use abbreviations like "A" for Active or "T" for Terminated. The system can normalize these during processing.
Date formats — Various date formats are automatically detected and standardized.
Name formats — "Last, First" vs "First Last" formats are handled based on your column mapping choice (Full Name vs. First/Last Name).
Override Detection
When processing a statement, the system can detect if incoming data would override existing CRM values. Override detection:
Compares mapped values against current CRM records.
Flags rows where key fields (policy number, premium, etc.) differ.
Lets you review and approve or reject overrides before they are applied.
This is configured in the statement detail view before running the Apply and Backfill module.
Related Articles
Commission Statements Overview
Apply and Backfill Module
Setup Checklist