
Tasks — Document Attachments
You can attach files to task comments. This is useful for sharing supporting documents like PDFs, spreadsheets, images, or Word documents alongside your notes.
Requirements
Document attachments are available when a task is linked to an individual's profile. If the task is not linked to anyone, the attachment option does not appear.
Supported File Types
You can upload files with the following extensions:
PDF (.pdf)
Word documents (.docx, .doc)
Images (.png, .jpg, .jpeg)
Spreadsheets (.xlsx, .csv)
The maximum file size is 10 MB per file.
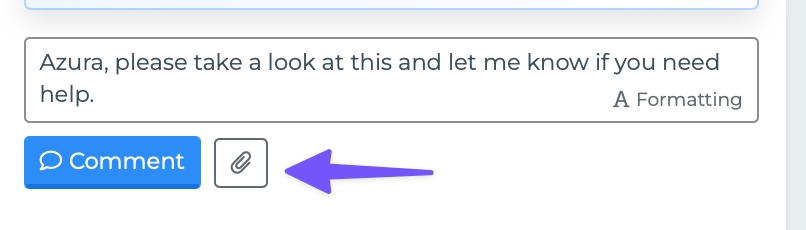
Attaching a File to a New Comment
Open a task in the Task Editor.
In the comment form at the top of the timeline, click the paperclip icon.
An upload area appears with a dashed border.
Click "Select File" and choose a file from your computer.
Click "Upload" to upload the file.
After the upload completes, a chip appears next to the Comment button showing the file's name.
Type your comment text (optional) and click "Comment" to post.
The comment is saved with the document attached.
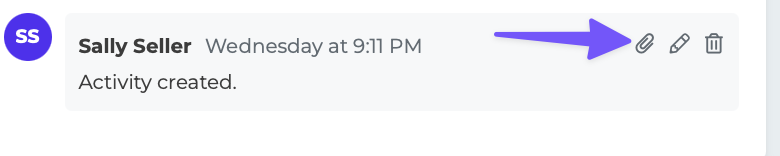
Attaching a File to an Existing Comment
You can also add a document to a comment that has already been posted.
Hover over the comment to reveal the action icons.
Click the paperclip icon on the comment.
An upload area appears below the comment.
Select and upload your file.
The document is attached to that comment automatically.
Only the original author of a comment can attach a file to it.
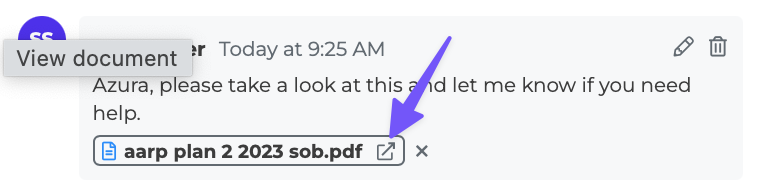
Viewing an Attached Document
When a comment has a document attached, it appears as a small badge chip below the comment text. The chip shows a file icon and the document name (truncated to 28 characters if the name is long, with the file extension always visible).
Click the chip to open the document in a new browser tab. The system generates a secure, temporary link to view the file.
Detaching a Document
If you attached a file by mistake, you can remove it:
Find the document chip on your comment.
Click the X button on the right side of the chip.
The document is detached from the comment.
Only the original author of the comment can detach its document.
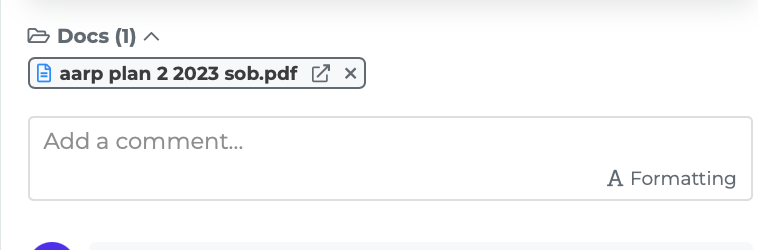
The Docs Section
Below the timeline, a collapsible "Docs" section aggregates all documents attached to any comment on the task. The count appears in parentheses, e.g., "Docs (3)."
Click the folder icon to expand or collapse this section.
Each document in the list shows:
A file icon
The document name (truncated if long)
An external link icon
Click any document to open it in a new browser tab. If you are the author of the comment it was attached to, an X button appears to detach it.
This section gives you a quick overview of all files related to a task without scrolling through the entire timeline.
Tips
Attach supporting documents directly to relevant comments so the context is clear.
Use the Docs section at the bottom of the editor for a quick view of all attachments.
If a file is too large (over 10 MB), you will see an error message. Try compressing the file or using a smaller version.
The document link is temporary and secure — it expires after a short time for security purposes.